
Setting Up Audiences
The Try-On Setup page lets you control where virtual try-on appears on your store and create audience segments with different try-on allowances. This gives you fine-grained control over who can use try-on and how many tries they get.
Accessing Try-On Setup
Go to Apps → MirrorNex → Try-On Setup to configure your audiences and product visibility settings.
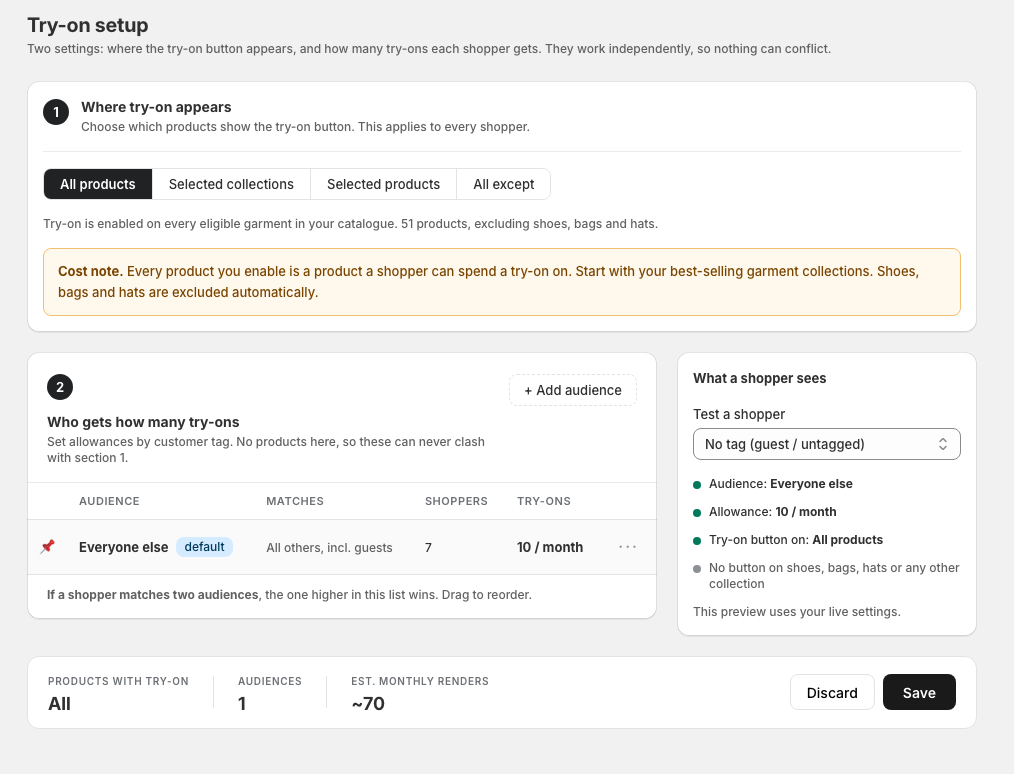
Section 1: Where try-on appears
Control which products show the try-on button:
All products
Show the try-on button on every product in your store. This is the simplest option if all your products support virtual try-on.
Specific collections
Show try-on only on products in selected collections. Useful if you only have certain product types that work with try-on (e.g., clothing but not accessories).
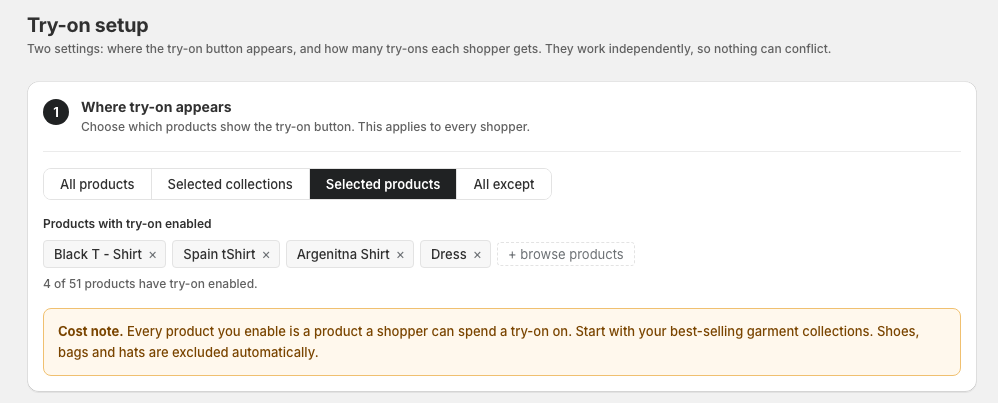
Specific products
Show try-on only on individually selected products. Best for stores that want maximum control.
All except
Show try-on everywhere except on selected products or collections. Useful when most products work with try-on but a few don't.
Section 2: Audiences
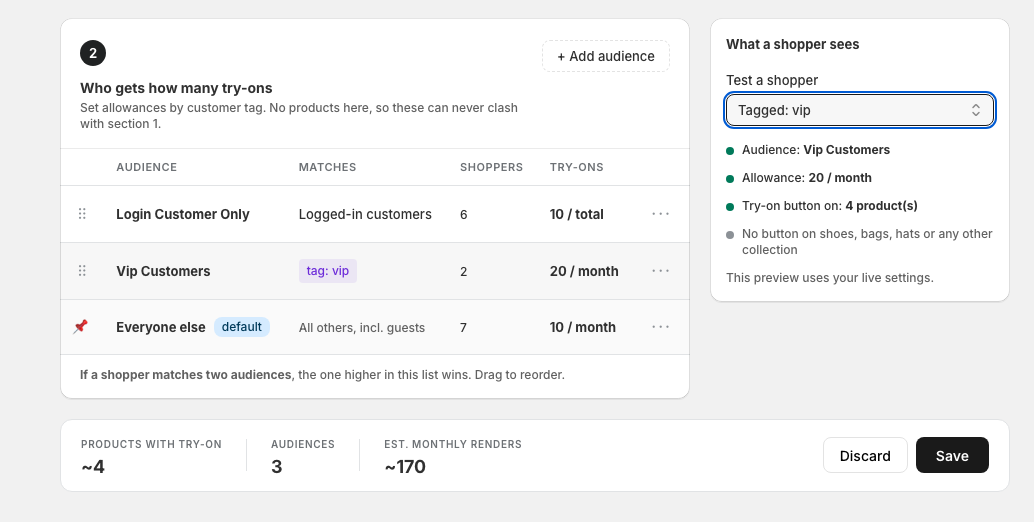
Create audience segments with different try-on allowances. Audiences are matched based on customer tags in Shopify.
How audiences work
Each audience has:
- Name — A descriptive name (e.g., "VIP Customers", "New Shoppers")
- Customer tag — The Shopify customer tag that identifies this audience
- Try-on allowance — How many try-ons customers in this audience get
- Priority — Determines which audience applies when a customer matches multiple
Creating an audience
- Click Add Audience
- Enter an audience name
- Select the customer tag that defines this audience
- Set the try-on allowance (number of try-ons per period)
- Click Save
Audience priority
When a customer matches multiple audiences, the highest priority audience applies. Priority is determined by the order in the list — audiences at the top have higher priority.
To change priority: Drag and drop audiences to reorder them. The topmost audience has the highest priority.
If you have "VIP" (unlimited try-ons) at priority 1 and "Standard" (5 try-ons) at priority 2, a customer with both tags gets unlimited try-ons.
Default audience
Customers who don't match any audience tags fall into your default audience. Make sure to configure a default with reasonable allowances for new or untagged customers.
Testing your setup
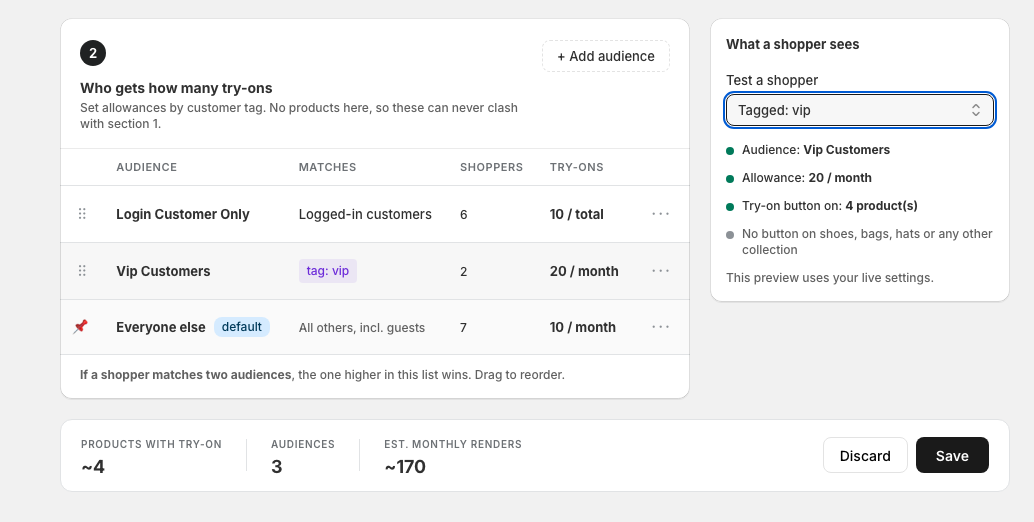
Use the sidebar preview to test how your audience rules work:
- In the Test Shopper section, enter a customer tag
- The preview shows which audience that customer would match
- Verify the correct try-on allowance is displayed
This helps you confirm your rules work as expected before going live.
Common audience setups
Tiered by loyalty
- VIP (tag: "vip") — Unlimited try-ons
- Gold (tag: "gold-member") — 20 try-ons/month
- Standard (tag: "customer") — 5 try-ons/month
- Guest (default) — 2 try-ons/month
Encourage signups
- Members (tag: "account") — 10 try-ons/month
- Guest (default) — 1 try-on only
Wholesale vs retail
- Wholesale (tag: "wholesale") — Unlimited try-ons
- Retail (default) — 5 try-ons/month
Linking to campaigns
Your audience segments are also used for email campaigns. When you create a campaign, it's automatically grouped by the audience it targets, making it easy to send relevant messages to each customer segment.