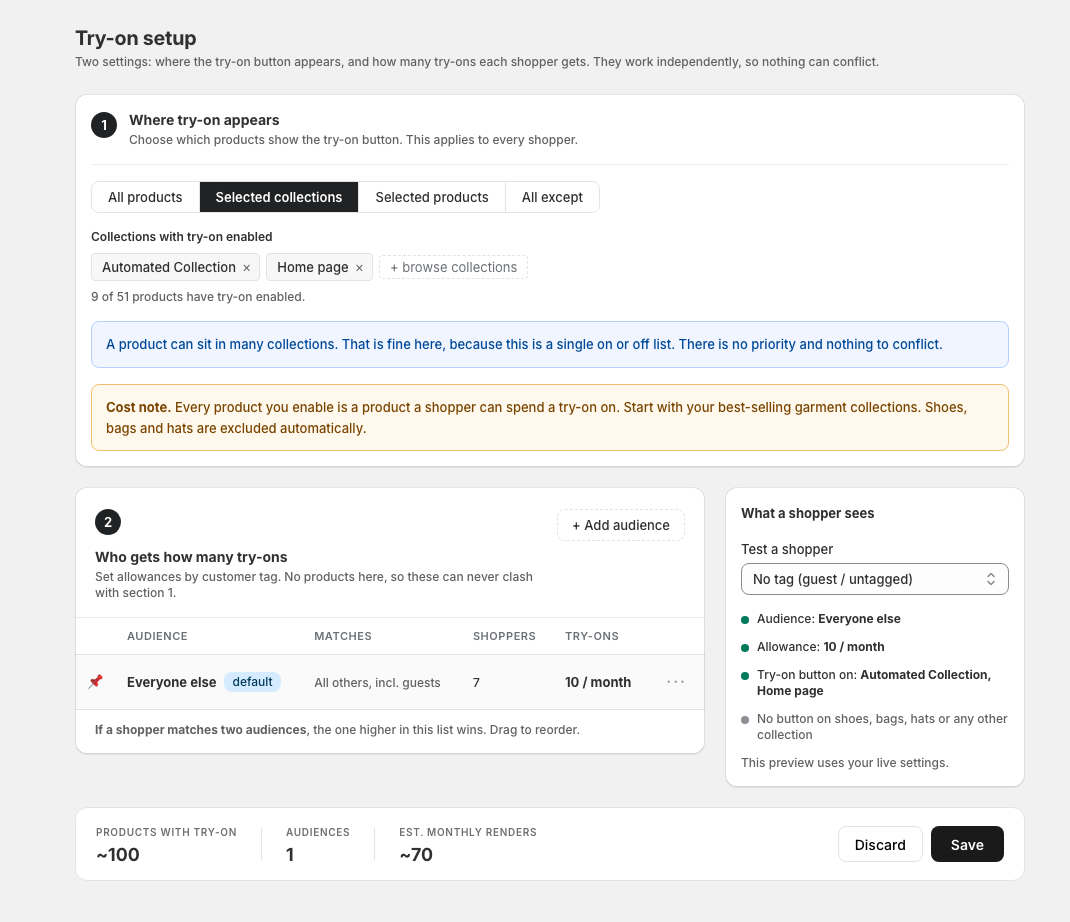
How to enable try-on for specific products
You control which products show the try-on button from the Try-on Setup page in MirrorNex. By default, your first eligible products are enabled up to your plan limit.
Which products work with try-on?
MirrorNex virtual try-on works best with:
- Tops — T-shirts, shirts, blouses, sweaters, jackets
- Dresses — All styles and lengths
- Outerwear — Coats, blazers, hoodies
- Full outfits — Jumpsuits, rompers
Where to configure product scope
Product selection is configured in the "Where try-on appears" section of the Try-on Setup page.
Open MirrorNex in your Shopify admin
Go to Apps → MirrorNex.
Go to Try-on Setup
Click on Try-on Setup in the navigation menu.
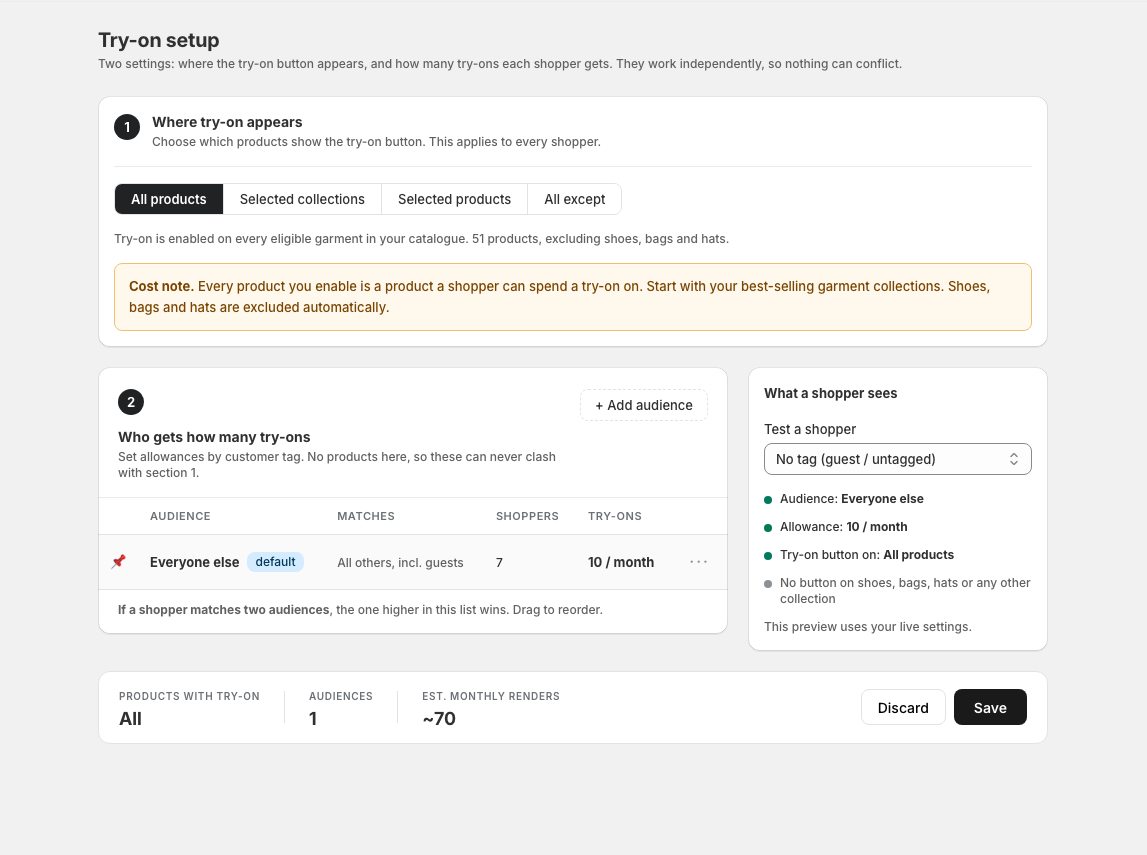
Choose your product scope
In the "Where try-on appears" section, select one of the four options using the tabs.
Product scope options
You have four ways to control which products show the try-on button:
All products
Try-on is enabled on every eligible garment in your catalogue. Shoes, bags, and hats are automatically excluded.
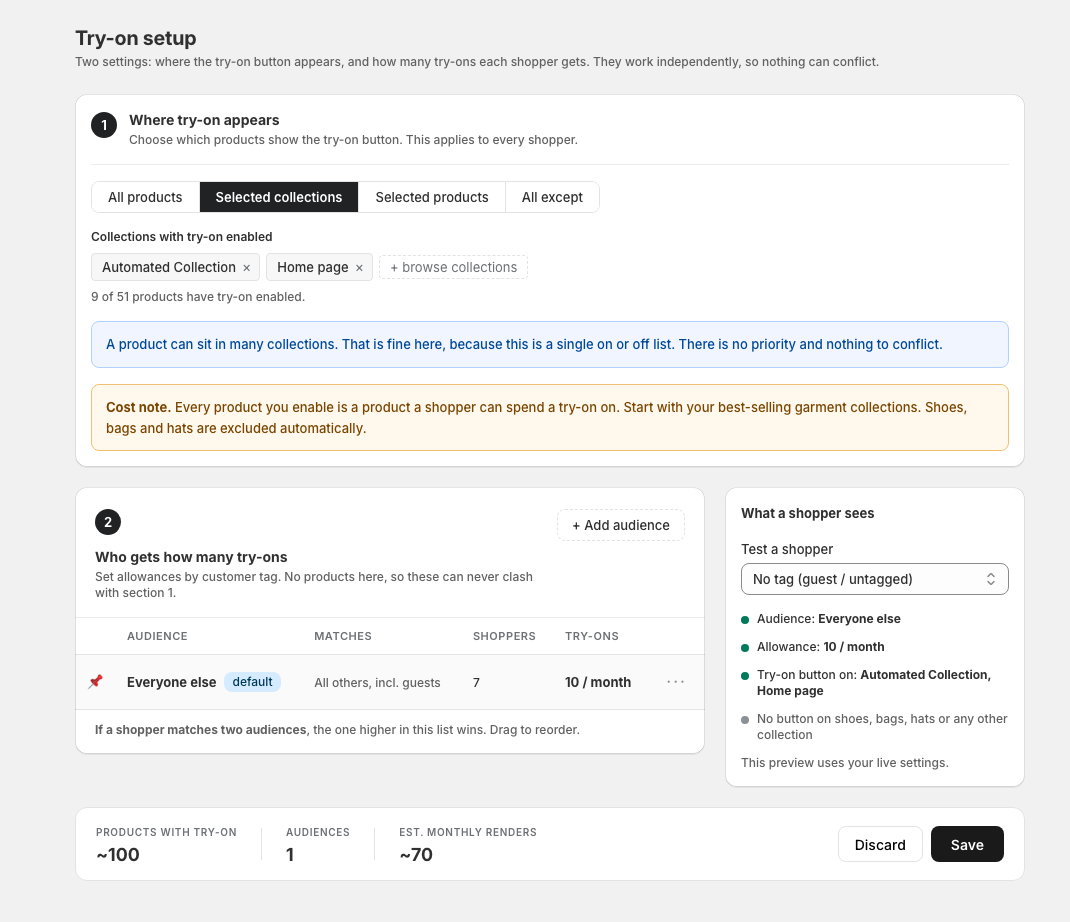
Selected collections
Enable try-on only for products in specific collections. Click "browse collections" to select which collections should have try-on enabled.
Selected products
Enable try-on only for specific individual products. Click "browse products" to pick exactly which products should have try-on.
All except
Enable try-on on all products except the ones you select. Use this to exclude specific products that shouldn't have try-on.
Saving your changes
After selecting your product scope, click the Save button at the bottom of the page. Your changes will take effect immediately on your storefront.