
How to change button text
Customize the try-on button label to match your brand voice or to better explain the feature to your customers.
Changing the button label
1
Open Widget appearance
Go to Apps → MirrorNex → Widget appearance.
2
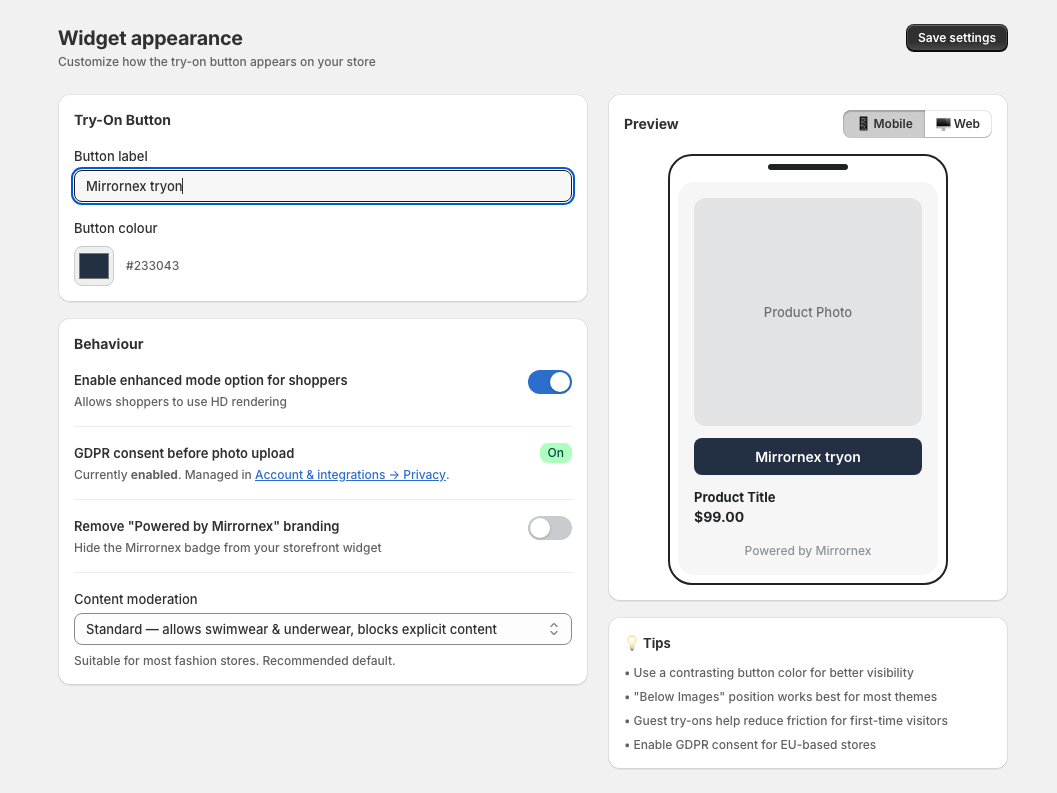
Find the Button label field
In the Try-On Button card, locate the Button label text field.
3
Enter your preferred text
Type your desired button text. The preview on the right will update immediately.
4
Save your changes
Click Save settings at the top right.
Button text ideas
Here are some popular button text options:
- "Try it on" — Simple and clear (default)
- "Virtual Try-On" — More descriptive
- "See It On You" — Customer-focused
- "Try Before You Buy" — Benefit-oriented
- "Try This Look" — Fashion-forward
- "See How It Fits" — Focuses on fit
Keep it short: Button text should be concise — 2-4 words works best. The maximum is 32 characters. Longer text may get cut off on mobile devices.
Preview your text
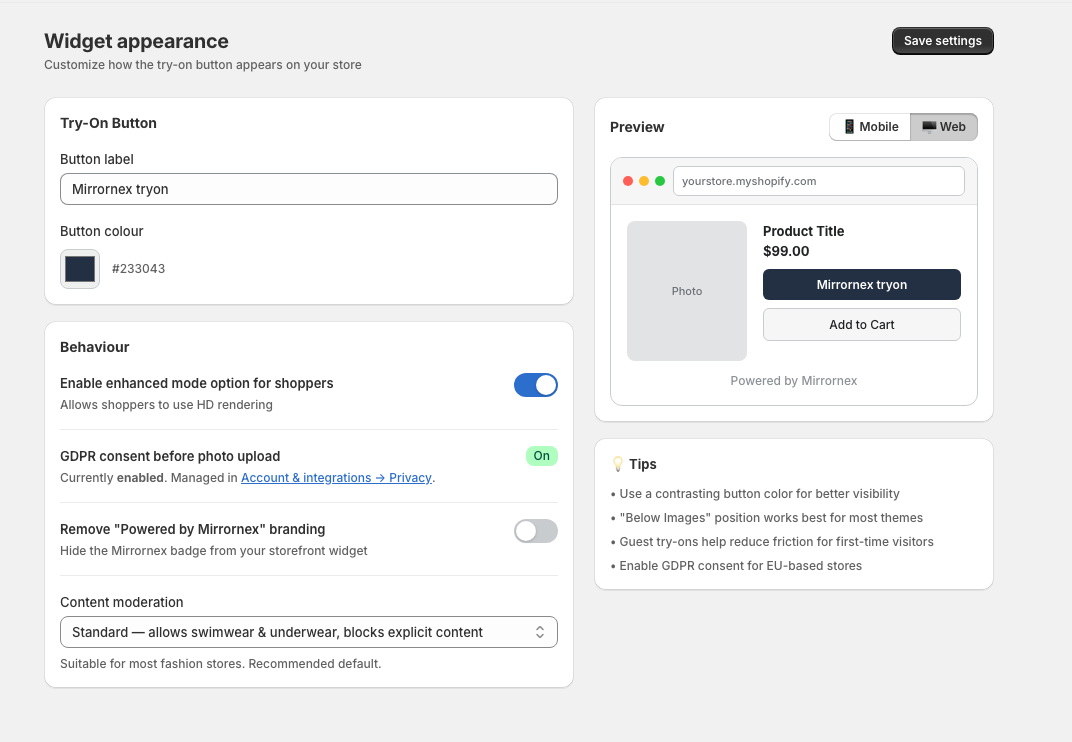
The preview panel on the right shows exactly how your button will look with the new text. Check both mobile and web views to make sure the text fits well on all screen sizes.
Best practices
- Be action-oriented — Use verbs like "Try", "See", "Experience"
- Match your brand voice — Casual, premium, playful, etc.
- Test on mobile — Make sure text isn't cut off on small screens
- Be clear — Customers should understand what the button does