
How to Create a Campaign
The MirrorNex campaign builder guides you through four simple steps to create personalized email campaigns featuring try-on results. Here's how to create your first campaign.
Make sure you've connected Klaviyo to MirrorNex first.
Getting started
- Go to Apps → MirrorNex → Campaigns
- Click the New Campaign button
- The campaign builder will open with four steps
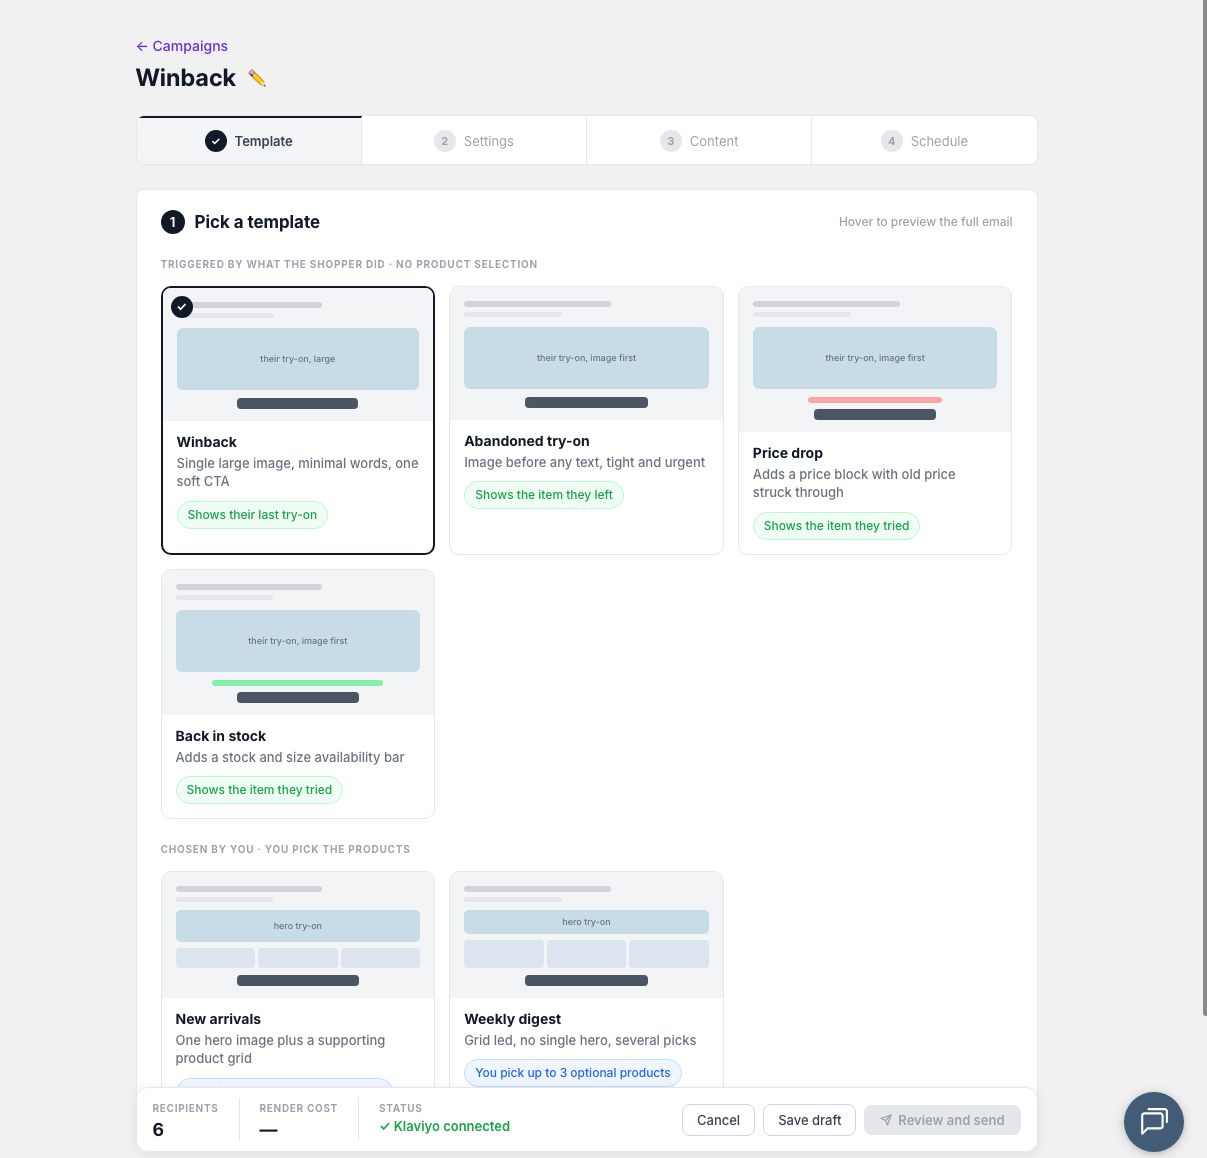
Step 1: Choose a template
Start by selecting a campaign template. Templates provide pre-designed layouts and content structures to help you get started quickly.
Available templates include:
- Try-On Showcase — Highlight recent try-on results
- Product Recommendation — Suggest products based on try-on history
- Re-engagement — Bring back customers who haven't purchased
- New Arrivals — Feature new products customers might like
Select a template and click Next to continue.
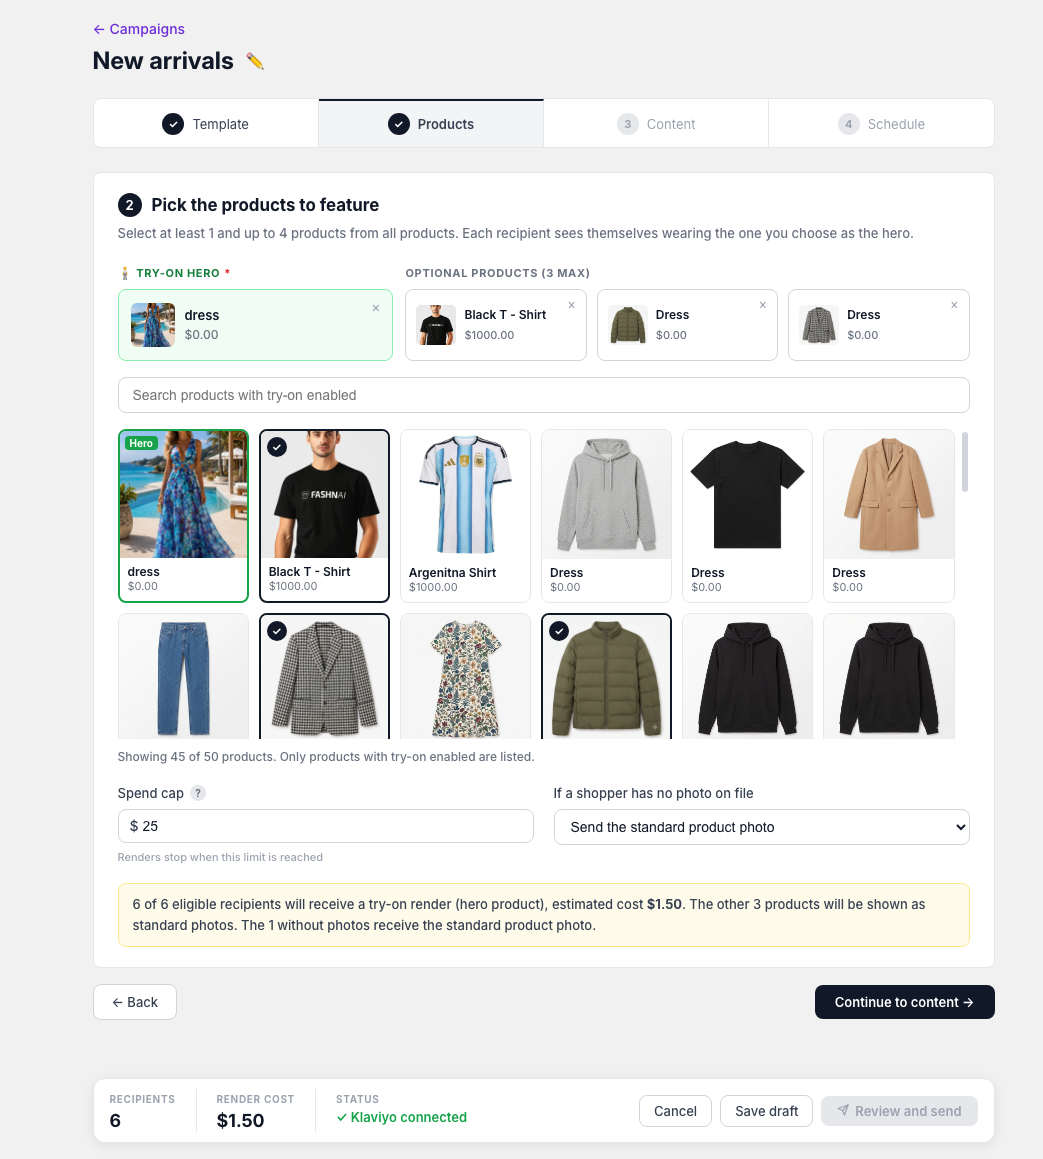
Step 2: Select products
Choose which products to feature in your campaign:
- Browse your product catalog
- Search for specific products
- Select multiple products to include
The products you select will appear in the email with links back to your store.
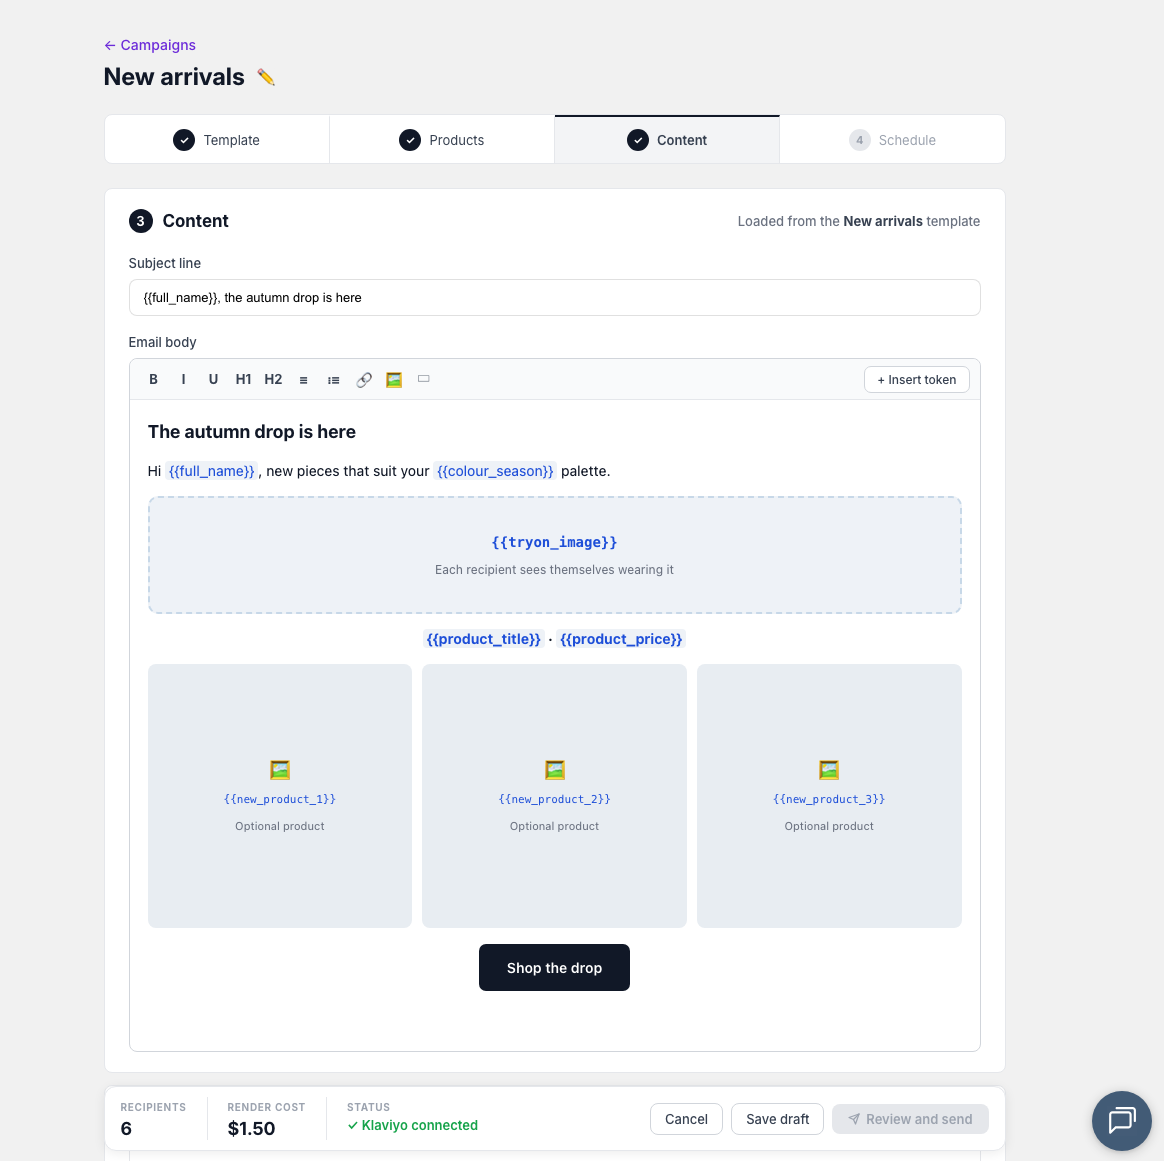
Step 3: Write your content
Customize the email content using the rich text editor:
Email subject line
Write a compelling subject line that encourages opens. Keep it under 50 characters for best results.
Email body
The content editor supports:
- Text formatting — Bold, italic, headings
- Links — Add URLs to text
- Images — Insert product images or try-on results
- Personalization — Use customer name and other variables
Keep emails concise and focused. Highlight 2-3 products maximum. Use clear calls-to-action like "Shop Now" or "View Your Try-On".
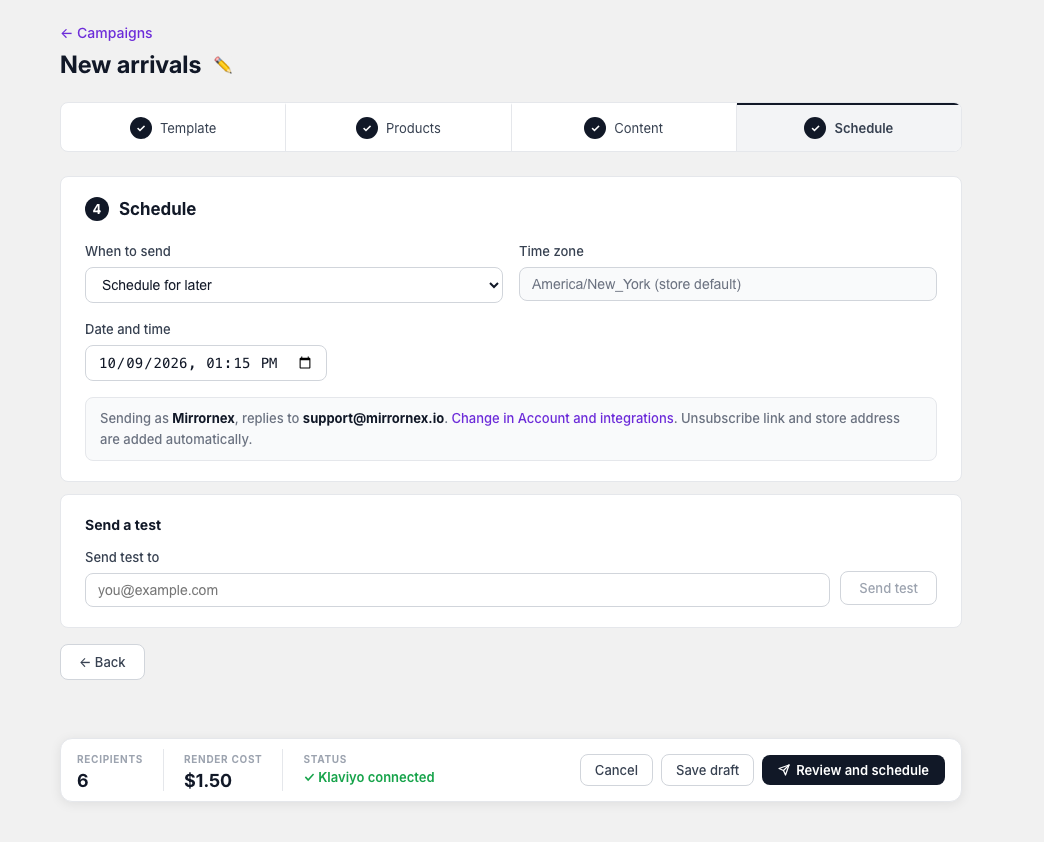
Step 4: Schedule delivery
Choose when to send your campaign:
Send options
- Send immediately — Campaign goes out as soon as you confirm
- Schedule for later — Pick a specific date and time
- Save as draft — Save and send later
Test send
Before sending to your audience, use Send Test to send a preview to your own email address. This lets you verify the email looks correct.
Audience targeting
Campaigns are automatically targeted to the audience associated with your try-on rules. When customers use virtual try-on, they're grouped by the audience rules you've set up in Try-On Setup.
After creating a campaign
Once your campaign is created:
- Scheduled campaigns — Will appear in your campaigns list with the scheduled time
- Sent campaigns — Start tracking performance immediately
- Drafts — Can be edited and sent later
Learn more about tracking your campaign results in Understanding Campaign Performance.